Pose of the Month: Sirsasana - Headstand

by SADIE LEIGHHey pals! We’re here today to discuss one of my favorite poses to practice and to teach - sirsasana! Sirsasana is the Sanskrit name for the headstand. In this entry, I’ll go over how to work towards this pose in your practice, but first, let’s go over WHY this pose is so wonderful. Known as "the king of the poses," headstand can seem scary, but it's actually one of the most attainable inversions out there! And it offers so many incredible benefits. Here are just a few of the reasons to incorporate the headstand into your practice.
- Like any inversion, sirsasana offers a literal change in perspective. Sometimes if I’m stuck in a rut or having trouble coming up with a solution for an issue, it helps to get upside down, and just look at things a little differently.
- Unlike other inversions, headstand is a cooling posture. At first, getting into this shape might feel quite challenging and effortful, but after practice, you’ll find you can stay in the pose, and actually relax, quiet the mind, and settle. In fact, this pose can become so calming that it can actually help with things like anxiety and insomnia.
- The pressure on the top of the head stimulates the pituitary gland, which regulates and informs several vital functions in the body, including growth, blood pressure, metabolism, and certain functions of sexual organs (I visited my pal Wikipedia to refresh my memory on this one!)
- Increased circulation and heart health! When you’re standing or sitting, most of your body is below your heart, meaning that your circulatory system has to fight gravity to bring blood into the heart to be filtered and sent back out into the body. In sirsasana, you give your heart a break by putting your heart below most of the body. Your heart will be so grateful!
- According to my teacher, Sri Dharma Mittra, this pose also stimulates the upper chakras and helps to develop what he calls “your sixth sense,” which is something like your ability to see and feel the divine in all living beings everywhere.
- It’s fun!
Okay, hopefully you’re sold and want to give it a try. First of all, let me say that I HIGHLY recommend you try your first few attempts under the watch of a teacher. I offer headstand in every single class I teach, so if you’ve never tried it before, come to class and I’ll help you through it! That being said, here’s the progression I use to help folks find their way into the pose:1. Start in hare pose. In this preparatory pose, it’s as if you’re on you hands and knees, with the knees about hip width distance apart, but instead of being on your hands, the very top of your head is on the floor. Your hands are back by the feet, either grasping the heels, or with the palms pressing down into the floor. The seat is lifted from the heels, so the thighs are almost perpendicular to the floor, the spine is rounding up, and the shoulders are moving away for the ears to create space for the neck. If this feels like a lot of work, maybe you want to stay just like this. The hare pose is an excellent preparatory pose for sirsasana-- it gets you used to having some pressure in the top of your head, strengthens the neck and shoulders, and offers many of the same benefits as the headstand. 2. If you feel ready to move forward from hare pose, the next step is wrap your hands behind the head with the fingers loosely interlaces. Your elbows should be quite narrow, no wider than the shoulders. Then you tuck your toes and lift your seat, kind of like downward facing dog. Weight should be split evenly between the forearms and the head, keep pressing down to avoid droopy shoulders.
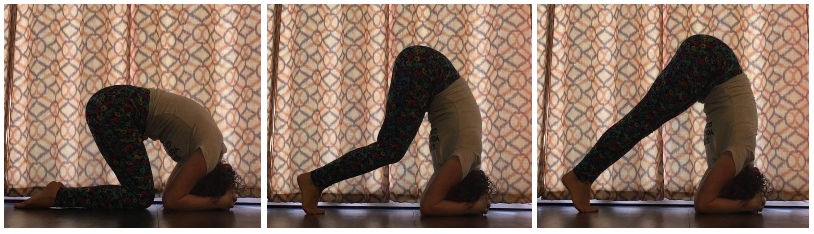 If your hamstrings or back are tight, this step can be done with slightly bent knees, just make sure you keep pressing down into the forearms. This is another great stopping place to build strength as well as comfort with getting the hips above the heart. 3. You’ll notice in the photo above that my hips aren’t quite over my shoulders, and so the next step is walk your feet forward as close to your face as possible. The idea is to stack the hips right over the shoulders, so the closer you can get to that before you start to lift you legs, the better! Once you feel you’re as stacked as possible, then you bend one knee so the foot comes off the floor, then you lift your knee. I repeat-- lift your KNEE! Not your foot! That’s right, folks, keep that lifted leg bent. And then put your foot down and repeat on the other side.
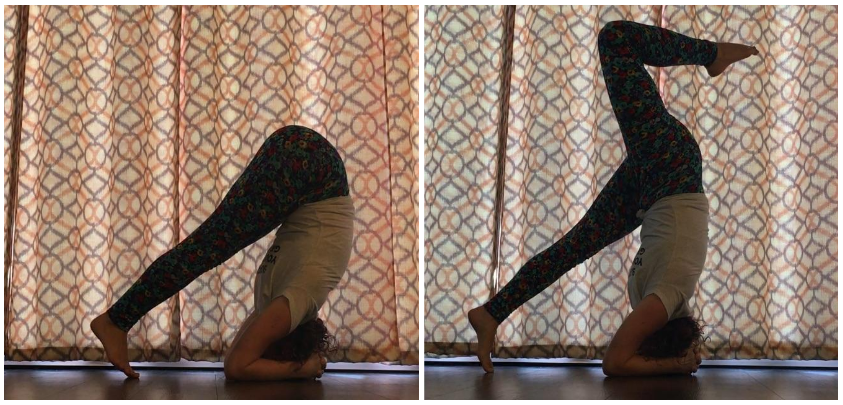 4. Okay, now is the scary part (read: the part you should practice with a qualified teacher if you’re new to headstand!). That lifted knee is going to keep lifting, lifting, lifting! Not straightening, just lifting, almost like you’re trying to reach your toes back behind you. Eventually, you reach up and back so much the other foot starts to get light on the floor, then you can bend your other knee, keeping it pretty close to the chest.
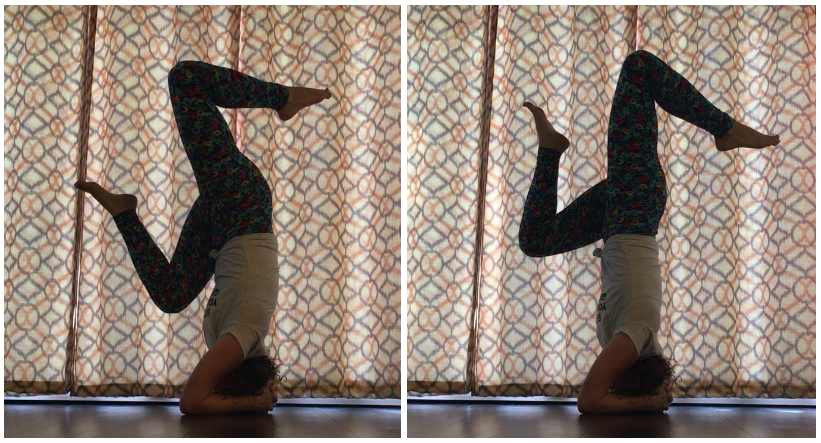 Then you have to go from the photo on the left to the photo on the right. It will likely feel like you’re going to fall backward, but move slow, and keep thinking about lifting up, rather than back. One way to think of this is to imagine that you’re contracting the muscles in your back, sort of like you do in the locust pose, or how it feels to roll up through your spine from a forward fold. 5. Now listen, once you’re here, you’ll probably get pretty excited about straightening your legs, and then you’ll probably fall, so be patient! Hang out with your legs split, your knees bent, and your feet relaxed. Get comfortable here. And then once you feel comfortable, see if you can switch your legs slowly and smoothly. Once you’re able to do that, then you can try bringing the knees together, imagining the knees pointing straight up toward the ceiling.
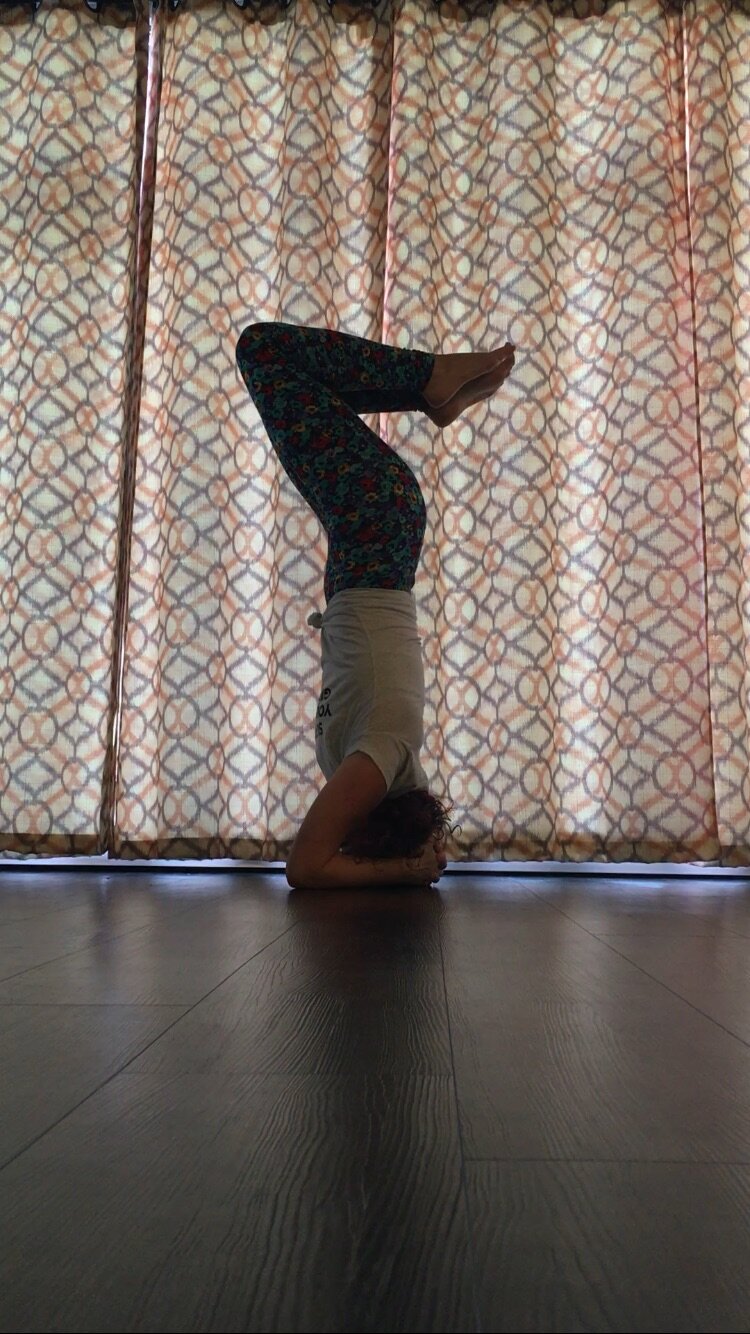 6. Keep the thighs and knees together. Imagine unfolding the legs from behind the knees, so the feet just float up. Once the legs are straight, lightly point your toes toward the ceiling. Feel like all the muscles in the body are hugging toward the bones, and all over there’s a gentle lifting up.
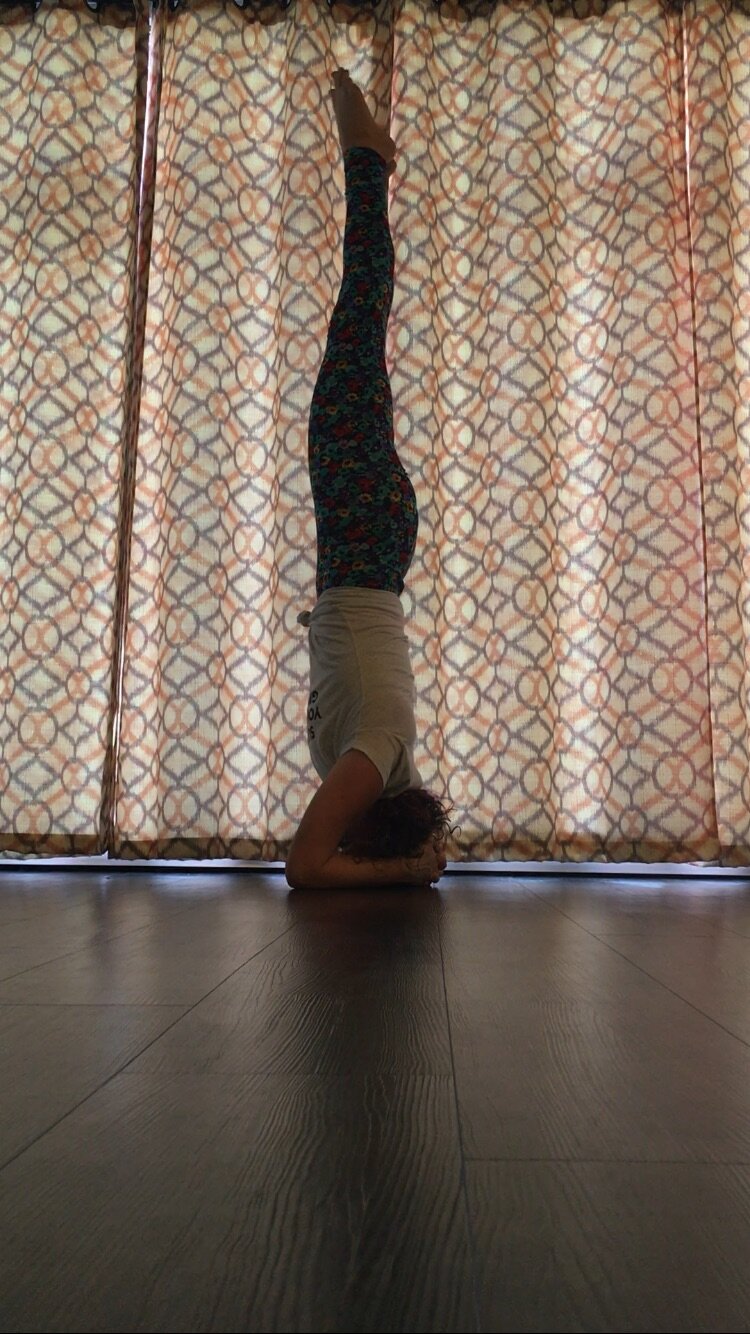 And that’s it! To come down, you can split your legs and bend you knees again. Then let your toes find the floor, then the knees find the floor, then rest in child’s pose. Don’t skip the resting! Any questions? Feel free to leave a comment, find me in the studio, or sign up for my How to Headstand workshop at our Georgia Ave studio on December 17th from 1-2:30p! In the workshop we’ll use an intelligent warm up, props, partnering, and our pal the wall, to learn how to safely work towards including this fun and beneficial posture in to your personal yoga practice. All levels welcome!