
Your Step-by-Step Guide to Practicing Yoga Outside

By Mike Winch - yogi, Yoga Heights studio assistant, and Petworth neighborI practice yoga every day, and although I don't always have the option, my favorite way to practice yoga is to go outside. I find the seasons changing keeps things interesting and prevents any stagnation in my practice. Also I just really like parks. If you've never practiced outside before, or tried it and didn't like it, maybe this record of my own experience and the changing weather will change your mind. Step 1: Decide on a destination Living near Rock Creek Park means that I have a huge area of ground to choose from, ranging from maintained public recreational areas to random little spots off the trail. I will take a day to explore a new area and make note of what spots have the best view in all directions while being somewhat easy to get to yet removed from areas of higher pedestrian traffic. Choosing a spot also depends on what your current goals are or what you want to work on while you’re outside. On the other hand, you may discover a place that makes you want to try something new or different. For example, I’ve been practicing hip openers all week, but an old tree laying across the creek would be a great place to do some balancing. Step 2: PrepareI recommend always bringing water, it doesn’t matter how hot or cold it is. Wear clothing that is appropriate for the weather: thermal base layers in the fall and winter and light clothing in the spring and summer. Since you’ll be outside, I recommend wearing either all-terrain boots or sandals, depending on how protected you want your feet to be. In my experience most sandals lose their grip when wet, so I usually stick with boots unless I know water won’t be around. If it’s a buggy time of year take a couple of citronella candles. Finally, I don’t recommend bringing a mat - it could get damaged and defeats the purpose of going outside! Step 3: Adapt to an outdoor practiceWhen you finally arrive at your location of choice with the right gear and some cool yoga friends (or not, you do you) you’ll be able to really start taking advantage of what practicing outside has to offer. This means beginning to adapt, especially to the type of ground you practice on.
- If you’re on rock, you’ll have to rearrange your practice so no joints will be crushed down on - for example, no low lunges or tabletops. Finding a sufficiently flat and yoga-ble rock surface on rock can be tricky, so don’t force it if you’re on a surface that’s not working.
- Grass is a decent choice, but it is less predictable since you can't always tell is the surface is flat, sloped, etc. If you’re going to practice on grass, take extra time to make sure there aren’t any bits of trash, glass, or metal beneath you.
- Wood, especially semi-rotten wood, is soft but treacherous. It may absorb your hands and joints well enough, but too much pressure and it will fall apart, sending you tumbling. This isn’t necessarily a bad thing - I like the challenge of managing risk - but be careful!
- Dirt is probably the most obvious choice to me. It’s easily accessible, if you fall on it you’ll be fine, you can’t fall off of it, and it gives under your joints. I’d say the two biggest downsides to dirt are 1) it’s not always in a very exciting location, and 2) it doesn’t offer a huge challenge.
- Mud is, in my opinion, the best material for doing yoga in, period. It depends on the consistency of the mud, but the best mud can be molded easily while still holding a form so it adapts to you just as much as you adapt to it.
- Finally, water yoga is its own thing. You can’t do inversions and depending on the height of the water there may be other poses that are difficult to do. You also may not be able to see the ground you stand on, which forces you to really seek ground out with your feet instead of your eyes. I use this to my advantage by treating water yoga as a specialty practice to just meditate on leg movement and steadiness.
Step 4: Enjoy your outdoor practice!The next step is to actually execute your practice. This involves taking your surroundings and ground into careful consideration as you go through your routine. The compromises you’ll have to take in position and attention are what make outdoor yoga special. You’re no longer in a studio or at home, there is no mat, and you are going to get dirty. Take what you’ve learned about your body and apply it to staying upright and carrying through. It might be hard but finishing a practice in a challenging location is satisfying in a unique way that only that place can offer.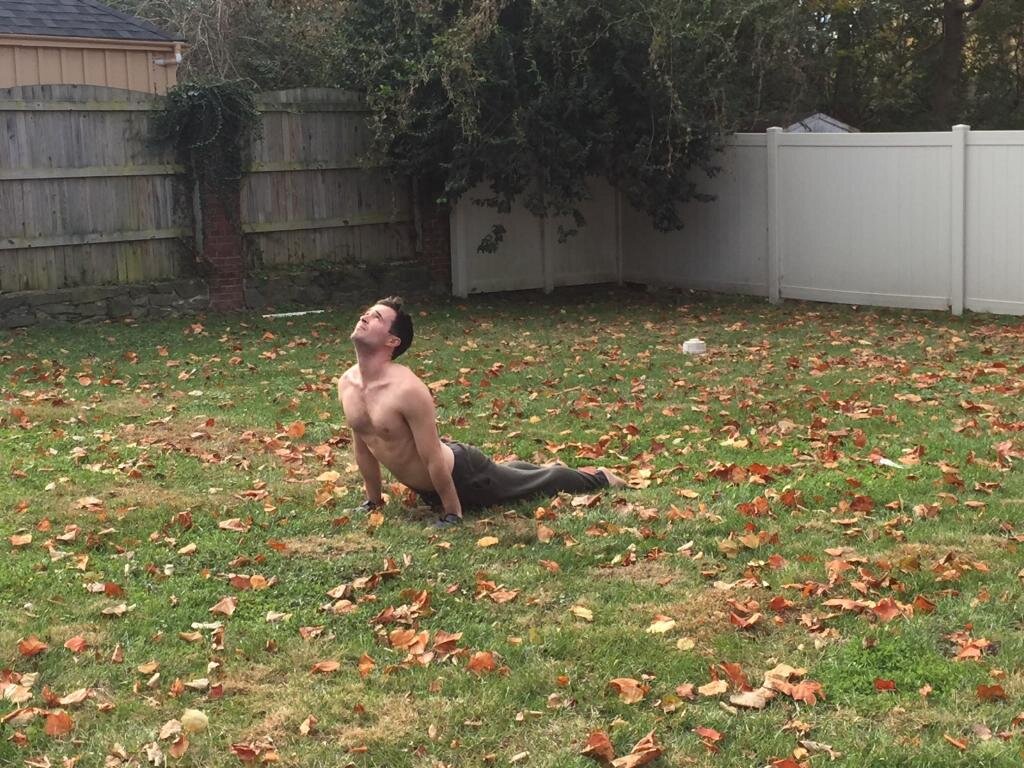 I don't mean to knock indoor practice. I practice indoors all the time, and if it weren't for studio classes I wouldn't even know how to practice yoga to begin with. I just like going outside. Leaves are pretty, grass feels nice, rocks are easy to grip, and the ceiling is literally the sky, which goes up and up forever (fact!). I feel lucky to have accessible outdoor recreation and I feel there's no reason not to take full advantage of it. Thank you for reading and I hope my words have had a positive influence on your practice. Feel free to leave a comment about your favorite way/place to practice outside!